Jasper’s Ears, Jowls & Neck

Let’s look at the jowls area and under the ears.  Jasper's Forehead Part 3

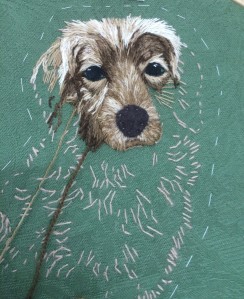
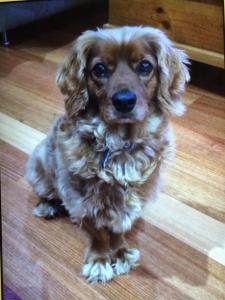
This area is very dark compared to other tones in the picture. Refer to   Jasper’s portrait.

With darkest thread tone, embroider with the angles of the stitch following the direction of the fur.Scissors rotated left

A clue here is to ask yourself which way does the fur sit naturally.

Which way would you pat the dog? This is how you stitch the fur.

If you could put your hand on this embroidery and stroke this dog, would you be able to brush the fur smoothly or rub against the angle of your stitches to rub him up the wrong way.
IMG_1266
IMG_1269

Note the ears

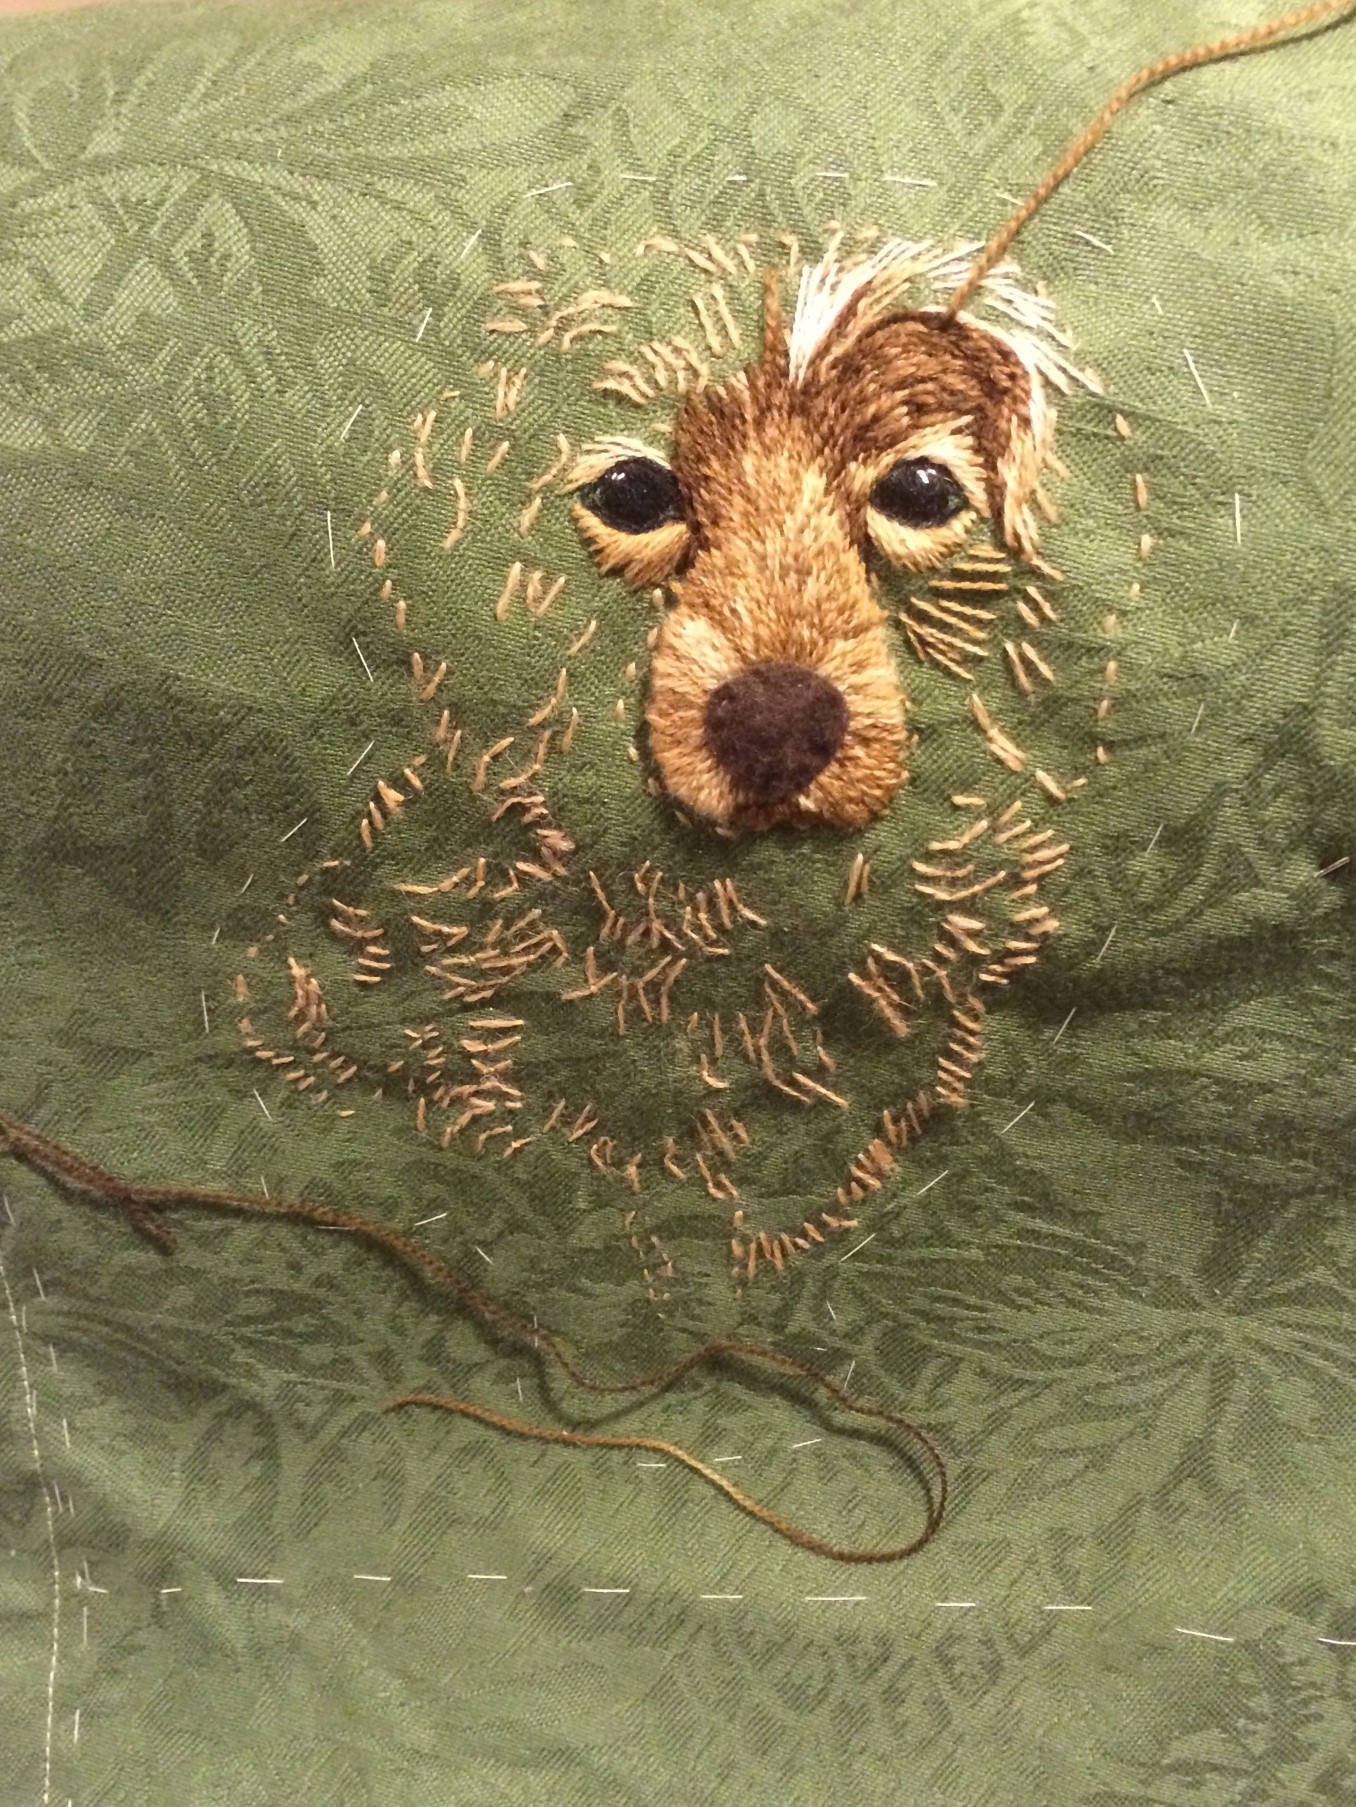
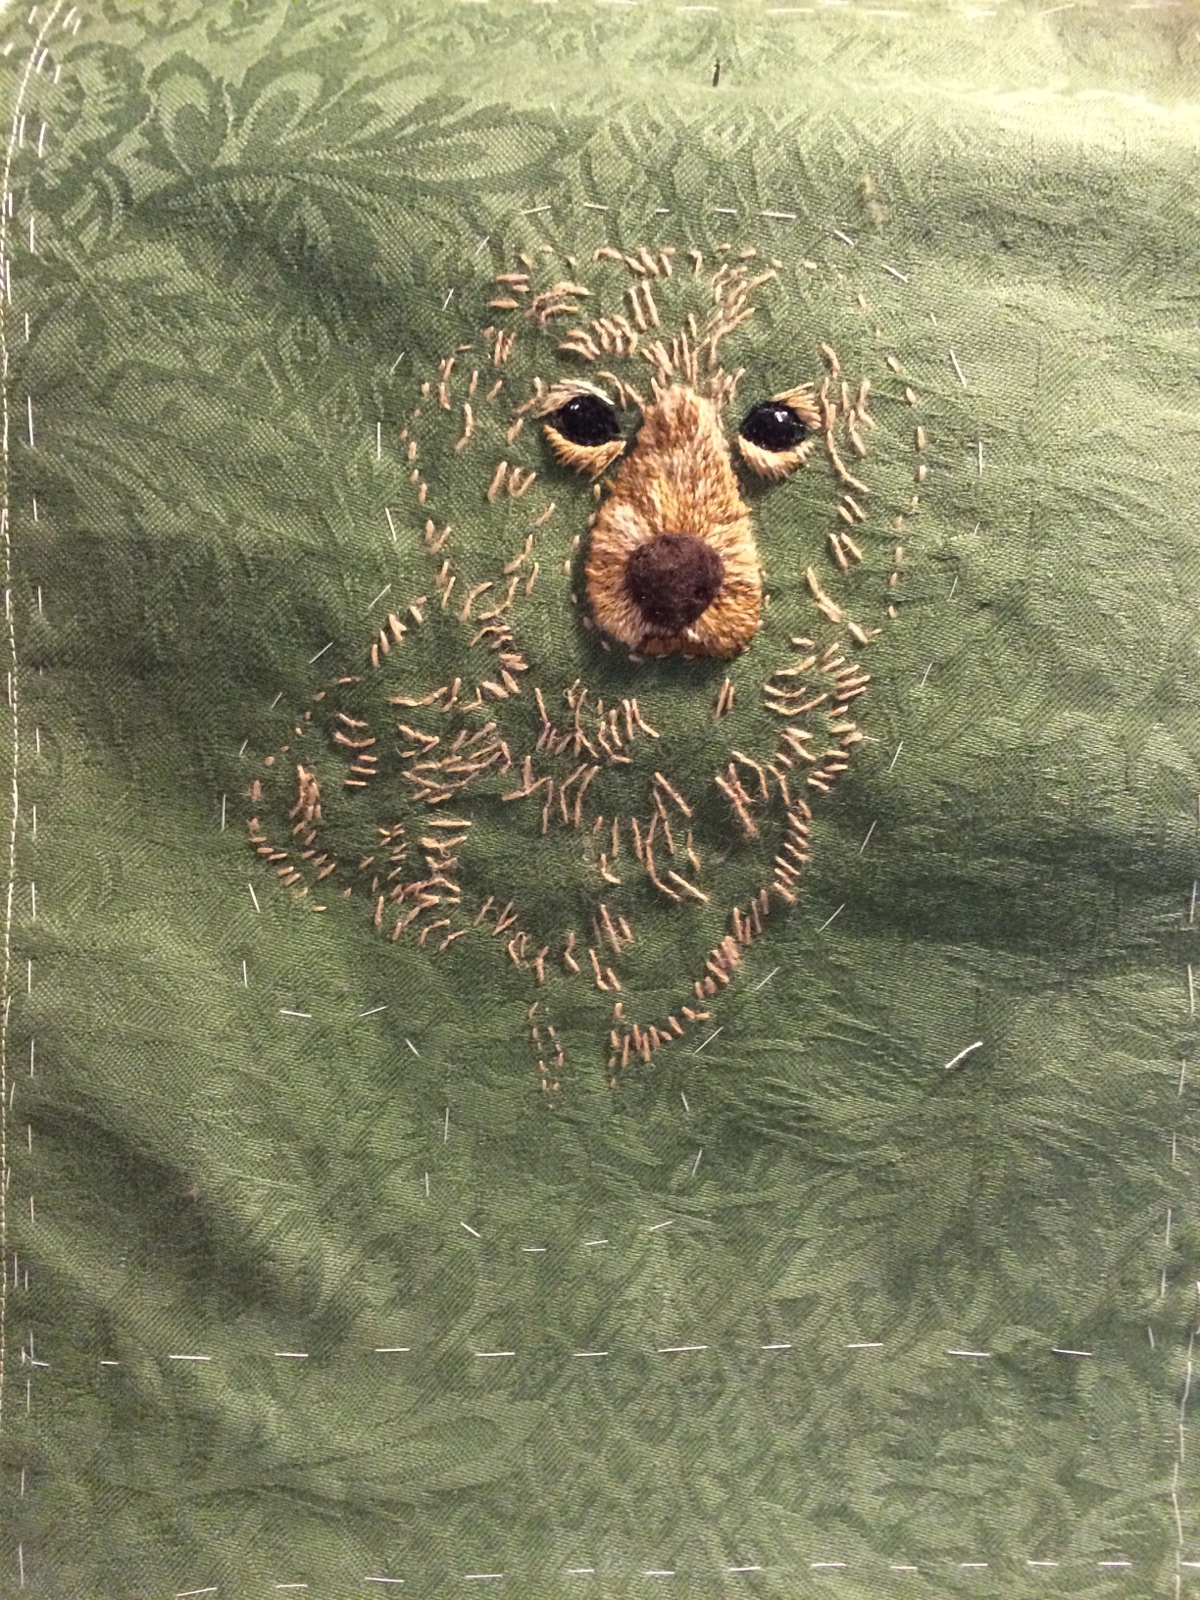
Begin with the  lightest areas. In this case the edge was done first but with two different angles, one layering over the other.

Sections of darker tones were then incorporated into their places. Blend each tone into the other.

Scissors rotated leftRemember this is a picture and we are not painting by numbers.

Advertisement

Jasper’s Forehead Part 2

Jaspers Forehead Part 2With the original Jasper’s portrait as a guide, continue embroidering  the other side of Jasper’s forehead with long and short stitch again taking care to follow the angle of the fur.

  1. Take careful notice of the shape of the light areas as opposed to the dark.

Jasper's Forehead Part 3ScissorsThe success of this picture depends on the values of tonal colors. i.e the depth of color in each strand of wool.Scissors

Jasper's Eyes

I stress to my students continually that you can’t see light without dark. Sometimes embroidery looks flat. Add a dark thread and as if by magic, the piece springs to life.

This principle works conversely. With light added to Jasper’s eyes around the bottom eyelids and highlights in the eyes, suddenly, Jasper is alive.

Jasper’s Forehead

Jasper's ForeheadRefer to Jasper’s portrait. Look closely at the dark and light areas of the forehead. These are the tones of color we are going to use.

1. Arrange the color tones of the threads from light to dark.

2. Where the portrait shows darkest, use the darkest thread tone.

3.  Embroider in long and short stitch in line with the angle of the fur.

4. For the remaining areas, adjust the thread color tone according to the shading in the portrait.