 Showcase Feature
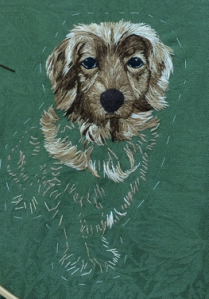
Congratulations Nermine from Bev Tully’s Friday morning class.
A stunning implementation of Helen Eriksson’s design
 Showcase Feature
 Congratulations Nermine from Bev Tully’s Friday morning class.
A stunning implementation of Helen Eriksson’s design
This week,Jasper gets his neck and chest.
 Examine the frill around Jasper’s chest.
 ![]() Make sure that your mind’s eye has a very clear understanding of the frill’s placement and tone before attempting any stitching.
Make sure that your mind’s eye has a very clear understanding of the frill’s placement and tone before attempting any stitching.
Refer Jasper’s Portrait
Turn to the back of your embroidery to the pattern tacked there. In the same direction as this pattern indicates, sew some stitches in line with the fur frill.
Turn back to the front. A guide has appeared to allow us to see the frill’s position.
Continue to embroider this area in the lightest tone
 In the neck area similarly, the lightest tones stand out.
Again, keeping in synch with the pattern on the back, embroider these areas first.
The darkest tones now become obvious and can be embroidered next. In some areas the difference between dark and light is too strong and can be softened by using medium tones.

– Glorious dimensional basket of striking proteas and grevillea.